Posts by Bradey Hall
How to Read the Water When Winter Fly Fishing
How to Read The River When Fly Fishing in the Winter
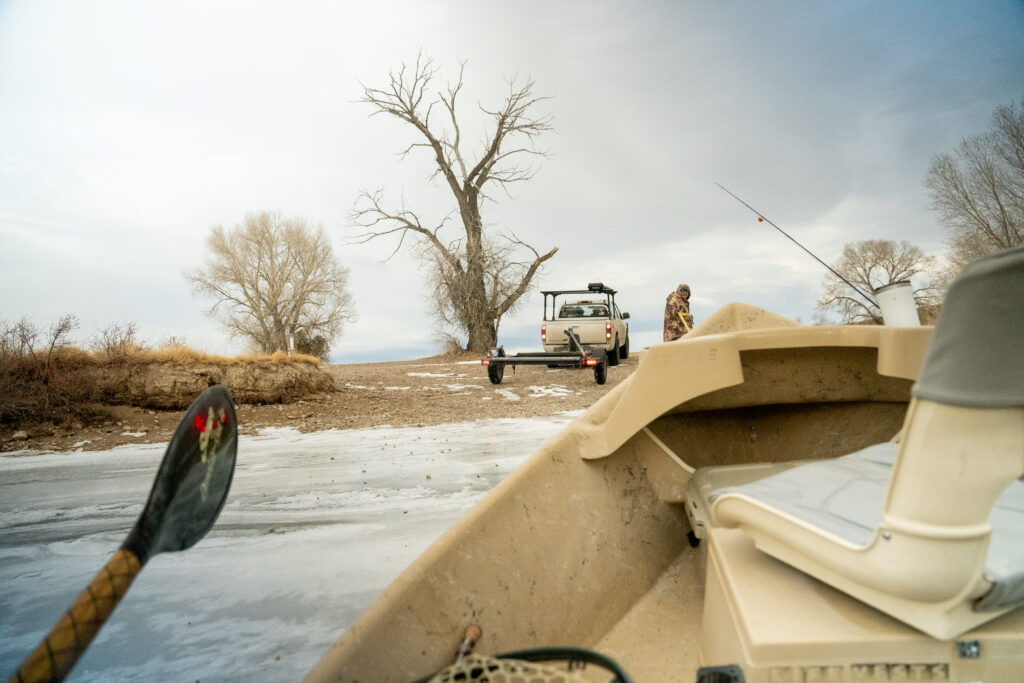
Fly fishing in the winter presents a unique set of challenges and rewards. With colder temperatures and slower fish activity, understanding how to read the river is crucial to success. Unlike in the warmer months, fish behavior and river dynamics shift significantly in the winter, requiring anglers to adapt their strategies. Here’s a comprehensive guide on how to read the river for fly fishing in the winter.

1. Look for Slow, Deep Pools
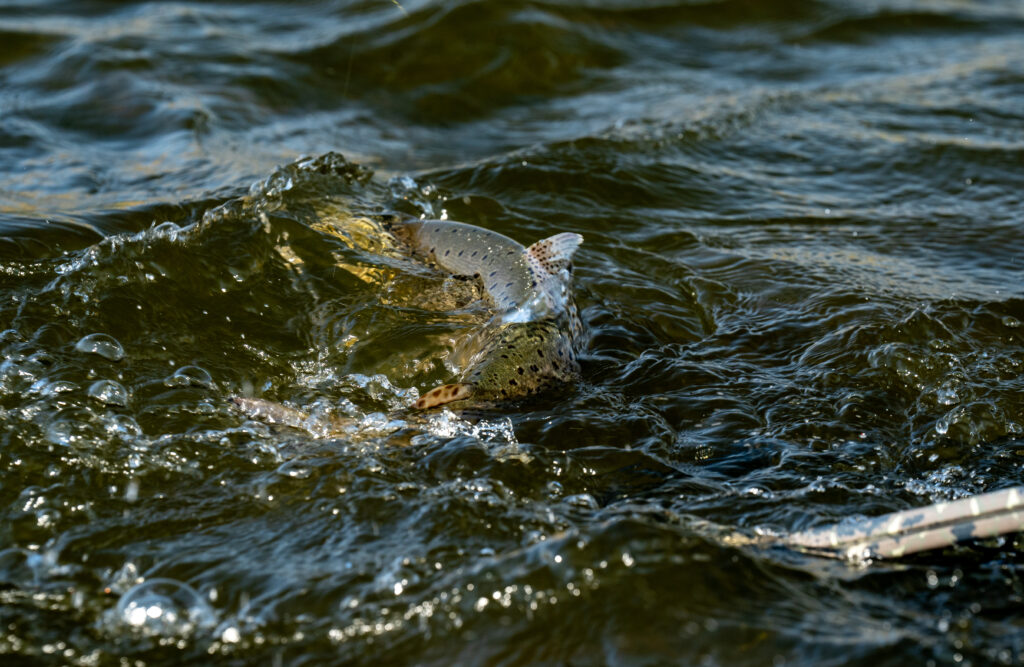
Winter trout conserve energy by holding in slow-moving, deep pools where the current is not as strong. These areas offer more stable temperatures and protection from predators. When scouting a river, focus on deep runs, tailouts, and eddies where fish are likely to congregate.
2. Identify Seams and Soft Water
Trout prefer to stay in areas where they expend minimal energy. Seams—the transitional zones between fast and slow-moving water—provide an ideal feeding ground. Soft water, such as back eddies and inside bends, also serve as resting spots for fish. Targeting these areas with precise casts increases the likelihood of a strike.
3. Pay Attention to Water Temperature
Water temperature dictates fish activity. Trout become sluggish when temperatures drop below 40°F (4°C), so focusing on sections of the river that retain warmth is key. Sunlit areas and deep pools where groundwater enters the river often hold slightly warmer water, making them prime locations for winter fishing.
4. Find Submerged Structure
Rocks, fallen trees, and undercut banks provide shelter and create microcurrents that attract insects and fish. Fish tend to hug the bottom near these structures, so using weighted nymphs or streamers that can reach lower depths will improve your chances.
5. Observe Insect Activity
Though winter hatches are sparse, midges and small stoneflies are still active in many rivers. Keep an eye on the water surface for any signs of rising fish or drifting insects. If there’s no surface action, nymphing with small, natural-colored flies can be effective.
6. Adjust Your Approach
With fish moving slower, presenting flies at the right depth and speed is essential. Use a slow retrieve and consider utilizing an indicator rig to keep your flies suspended in the strike zone longer. Additionally, downsizing tippet and flies can improve success in clear winter waters.
7. Time Your Outing Wisely
Unlike in warmer seasons, fish are most active during the warmest part of the day in winter, typically between late morning and early afternoon. Plan your fishing trips accordingly to maximize your chances of success.
Final Thoughts
Winter fly fishing can be incredibly rewarding for those who take the time to read the river and adapt their techniques. By focusing on slow, deep water, watching water temperature, and understanding fish behavior, you can increase your chances of a productive day on the water. Stay patient, dress warmly, and enjoy the solitude that winter fly fishing offers!
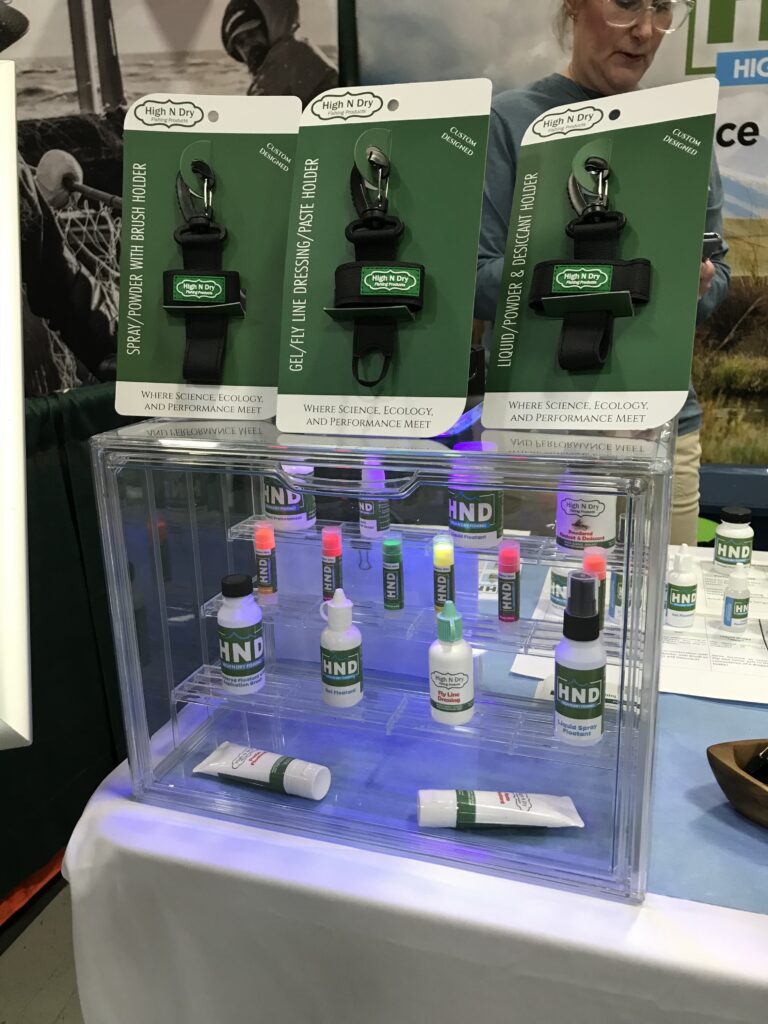
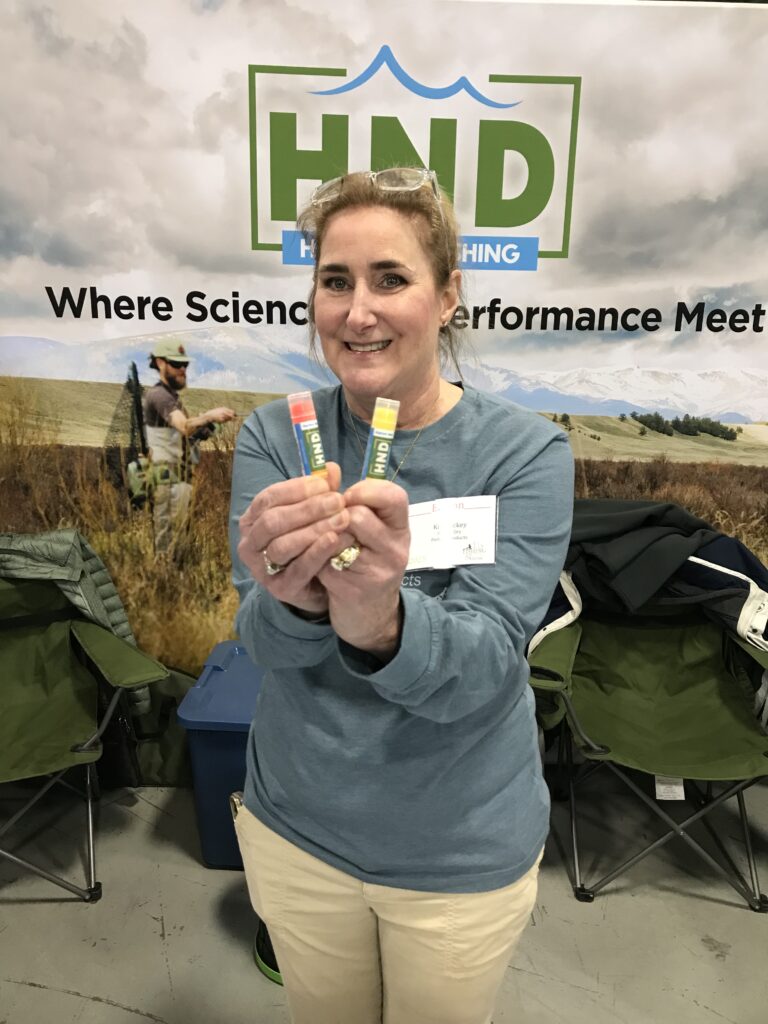
New Products, Tradeshows and More
We are excited to announce that we officially have 3 new products hitting the market and before they are in every fly shop across the world you might get a chance to see them first. We have a couple stops left on our fly show tour for 2025 and are counting down the days until the ice melts and the fishing turns back on. Until then make sure you check out some of our newest products. Walking around you might see a new logo on some of our bottles. Don’t worry, we are still the same environmentally conscious company bringing you the best possible floatant, We just have a new logo.
Fly Show Calendar
- Atlanta, GA. January 31-February 2, 2025.
- Denver, CO. February 21-23, 2025.
- Lancaster, PA. March 15-16, 2025.
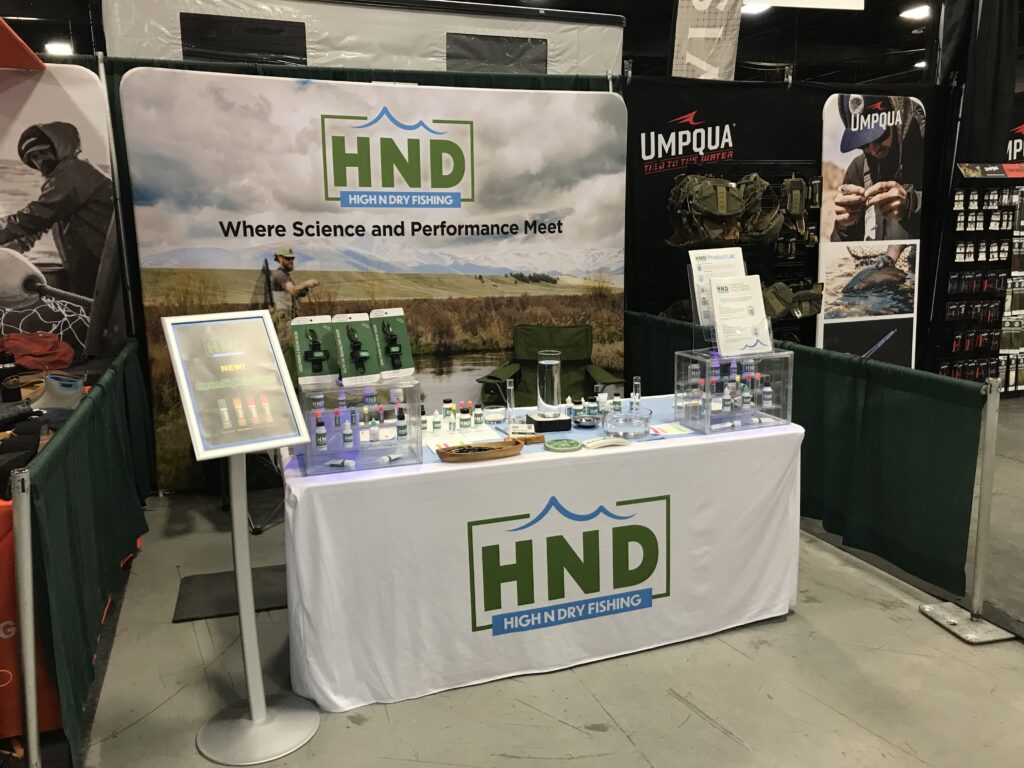
New Product Releases
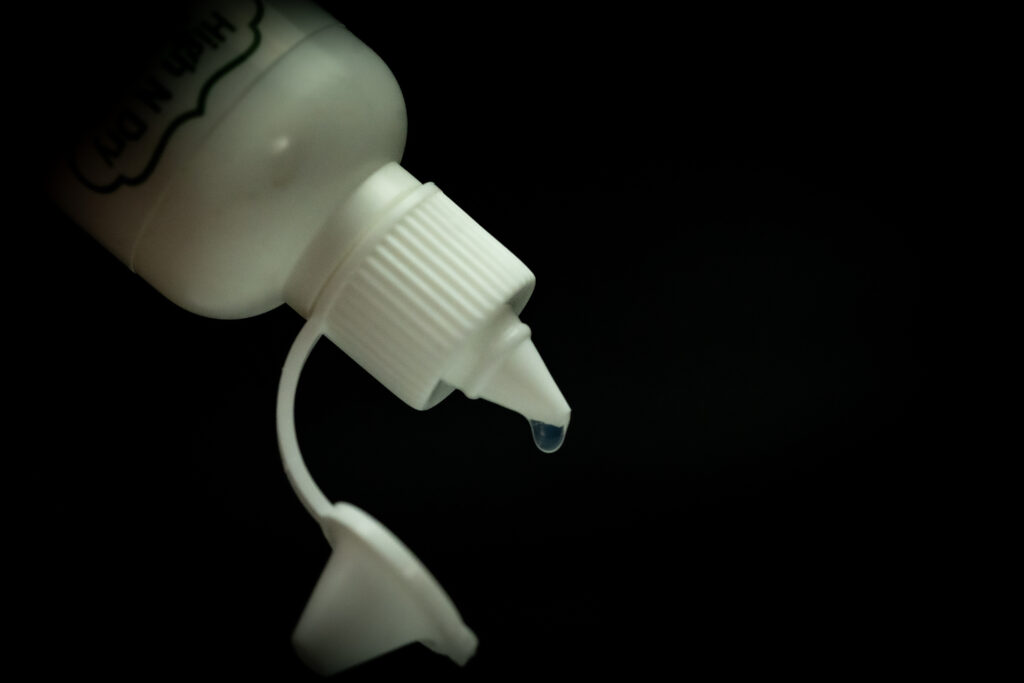
Liquid Floatant Drops
This product is our award-winning Liquid Floatant in a smaller and convenient dropper bottle. This method of application is simple, easy, and allows the fly fisher to be a bit more selective on which areas of the fly he or she wishes to apply the floatant. It works well on flies tied with all types of materials (including CDC). It contains no organic solvents, is 100% solids, and is environmentally friendly.
Pre-Treatment
Our Pretreatment was designed to be as effective as our other floatant products, but with special and unique materials to allow it to dry on the surface of the fly as well as soak into the fly fibers. The large opening in the bottle allows the fly fisher to soak their fly and allows the fly to be completely covered with waterproof and buoyant barrier. Once submerged, you can remove the fly and set it aside to dry overnight before putting the prepared fly in your fly box. It works well on flies tied with all types of materials (including CDC). It contains no organic solvents, is odorless, and is environmentally friendly.
Sighter Wax
Our innovative Sighter Wax is designed for streamside use and will allow you to mark your leader and tippet with various colors to provide a marker to determine the depth of your fly. Allowing you to keep your fly where the fish reside and keep a straight and tight rig throughout your drift while Euro Nymphing. To remove or adjust the color on your line, simply wipe it away with a cloth. Since it won’t add any significant weight, the Sighter Wax can also be used to add color to hard to see dry flies or strike indicators. Like all our products, the Sighter Wax is 100% environmentally friendly and odorless.
How to Care for and Maintain Your Fly Fishing Gear.
Fly fishing is an investment in both time and money, and keeping your gear in top condition is key to ensuring it lasts for many seasons of successful fishing. Whether you’re casting on a quiet stream or tackling a big river, your rods, reels, waders, and other equipment need to be cared for properly to ensure their longevity. Regular maintenance not only helps you avoid costly repairs or replacements but also keeps you out on the water. Here’s how to properly care for and maintain your fly fishing gear so it stays in top shape for years to come.
Clean Your Fly Rod
- After Each Use: Rinse your rod with fresh water to remove any salt, dirt, or debris. Grit and salt can cause corrosion and wear over time, so make it a habit to wash your rod after each fishing trip. This is very important if you fly fish salt water.
- Deep Cleaning: For a deeper clean, use a mild dish soap and warm water solution, along with a soft cloth to wipe down the rod. Pay special attention to the ferrules (the joints where the rod sections connect) as they can accumulate dirt. Dry the rod thoroughly before storing it.
- Inspect Regularly: Look for signs of damage, such as cracks, nicks, or loose guides. If you notice any issues, it’s best to have your rod repaired promptly to avoid further damage. Accidents happen and having a rod break while fighting a fish is not fun.
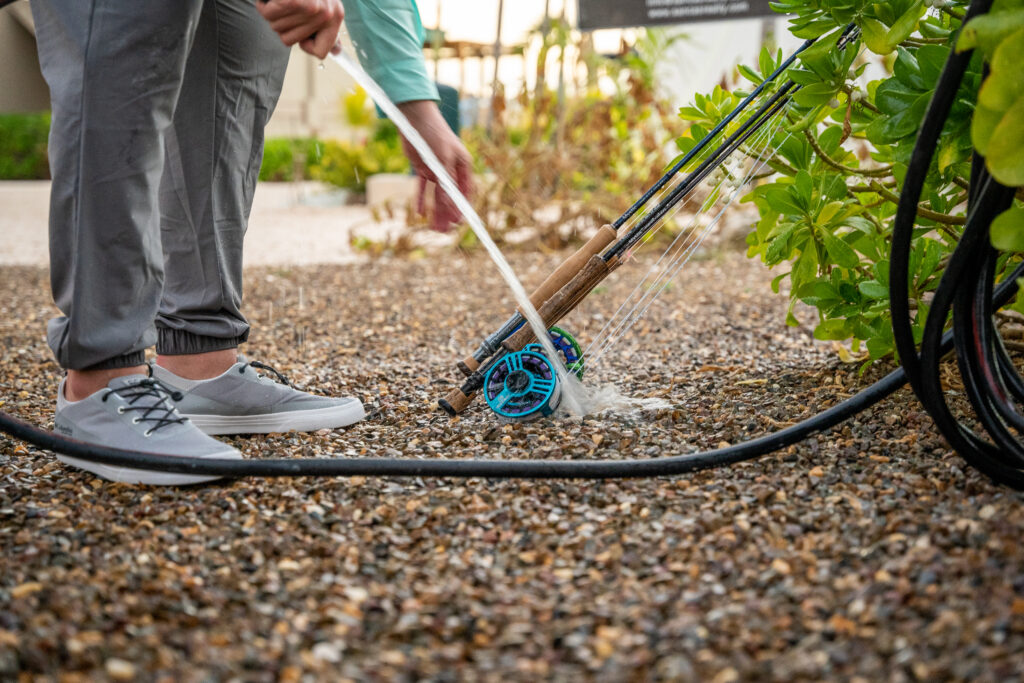
Reel Care: Keep It Smooth and Functional
- Rinse After Use: Just like your rod, your reel needs to be rinsed with fresh water after each fishing session. This is especially important if you’ve been fishing in saltwater, as salt can quickly corrode the reel’s components.
- Dry Thoroughly: After rinsing, make sure to dry the reel completely. Saltwater or moisture left behind can cause rust and erosion, leading to costly repairs.
- Lubricate the Reel: Periodically, you should apply a small amount of reel lubricant to the moving parts to ensure smooth operation. Avoid over-lubricating, as this can attract dirt and debris.
- Inspect the Drag System: The drag system is the heart of your reel’s performance, so it’s important to check it regularly for smoothness. If the drag feels sticky or uneven, clean and lubricate the internal components or have it serviced by a professional.
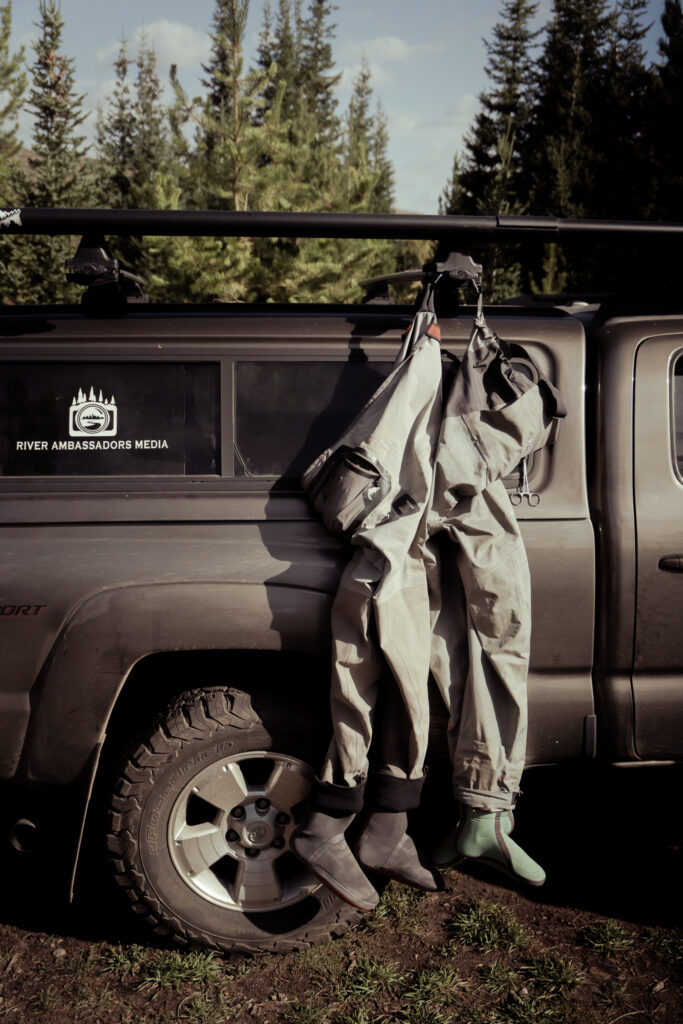
Wader Maintenance: Keep Them Leak-Free and Dry
Waders are your protective shield when fishing in cold or deep waters, so ensuring they stay in good shape is vital to your comfort and safety.
- Clean After Every Use: Wash your waders with fresh water after every use to remove mud, sand, debris and invasive species. Avoid using detergents as they damage the waterproofing on your waders. Washing your boots at the same time is incredibly important as it helps stop the spread of invasive species.
- Dry Thoroughly: Always hang your waders to dry after use. Avoid folding them up while they’re still wet, as this can cause moisture to seep into seams and zippers. Hang them upside down by the boots to allow air to flow through the legs and boots.
- Store Properly: Store your waders in a cool, dry place. Avoid leaving them in a hot car or in direct sunlight, as heat can degrade the waterproofing materials over time.
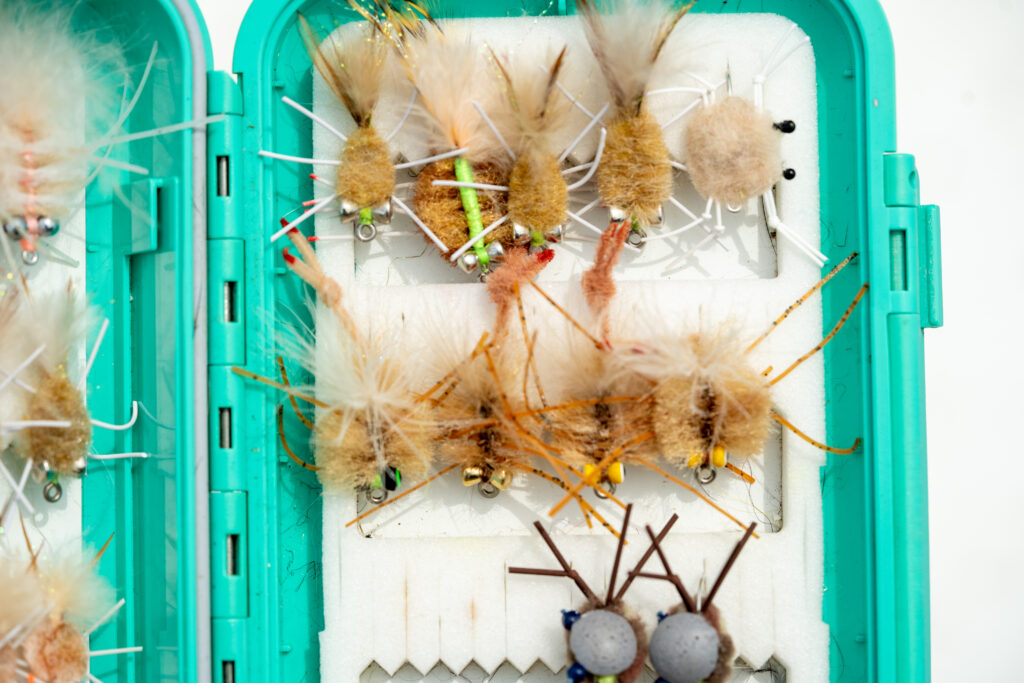
Caring for Your Fly Boxes and Flies
Your fly box keeps your collection of flies organized and accessible, so taking care of it ensures you’ll always be ready for any situation on the water.
- Keep Your Flies Dry: Always make sure your flies are dry before storing them in your fly box. Damp flies can rust your hooks.
- Organize Your Flies: Keeping your flies organized by type, size, or color helps you quickly find the right fly when you need it. This can also prevent unnecessary damage to delicate flies. A good fly box can make all the difference in the world.
Caring for Additional Gear
- Fly Fishing Nets: Clean your fishing net after every use to prevent the buildup of dirt, algae, or fish slime. Wooden nets should be oiled occasionally to prevent cracking. Rubber nets are easier to clean but should still be rinsed and dried thoroughly.
- Clothing and Gear Bags: If you use a fishing vest, jacket, or gear bag, regularly inspect them for wear and tear. Wash them according to the manufacturer’s instructions, and store them in a dry place to prevent mold or mildew from forming.
- Tippet and Leaders: Make sure to replace tippet and leaders that show signs of wear, such as fraying or stretching. Store them in a cool, dry place to prevent them from weakening over time.
Storing Your Gear: Keep Everything Protected
Proper storage of your fly fishing gear is just as important as cleaning it.
- Rods and Reels: Store rods in a rod tube to protect them from damage, and keep reels in a padded case to avoid bumps or scratches. Make sure rods are stored upright or horizontally, avoiding any weight placed on them that could cause bending.
- Waders: Hang waders by the boots, and avoid folding them to prevent creases that could damage the waterproofing. A wader hanger or a dedicated drying rack works well for this.
- General Storage: Keep all your gear in a cool, dry place—away from extreme temperatures or direct sunlight. Avoid storing gear in damp areas, as moisture can damage your equipment over time.
Protect Your Investment for Years of Enjoyment
Fly fishing gear is a significant investment, and properly caring for it will help you get the most out of your equipment. By cleaning, maintaining, and storing your rods, reels, waders, and other gear with care, you’ll ensure that they perform at their best for years to come. A little time spent on maintenance will go a long way in preserving the functionality and longevity of your gear, allowing you to focus on what matters most: enjoying your time on the water.
By taking these steps, you can maximize the lifespan of your gear, reduce the need for replacements, and keep your fishing experience smooth and successful season after season. So, next time you pack up your gear, remember that proper care today means more time spent fishing tomorrow!
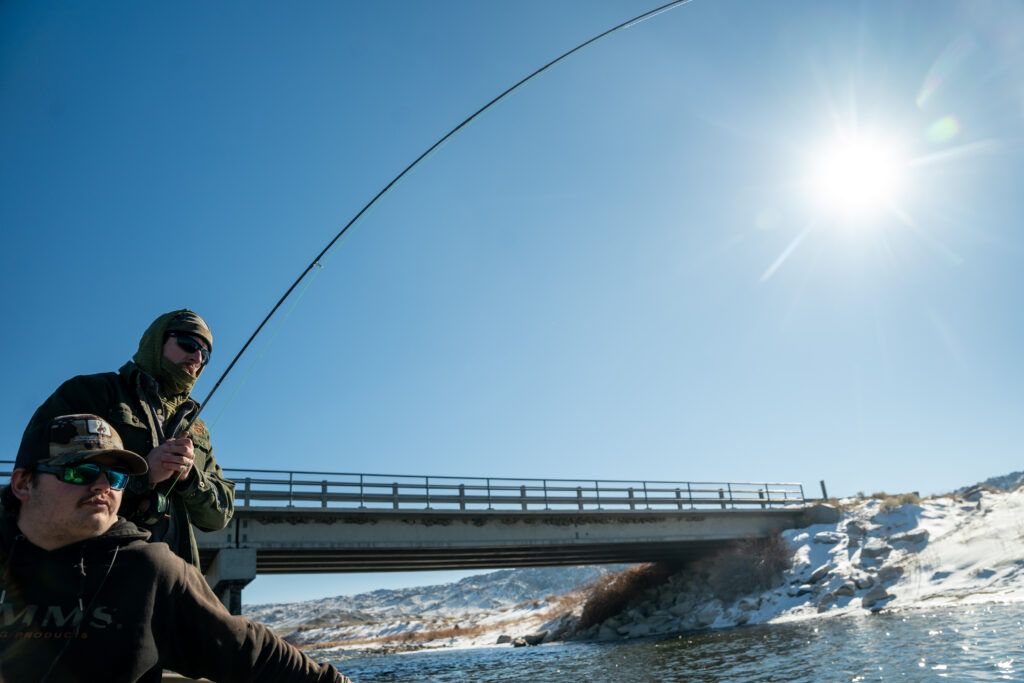
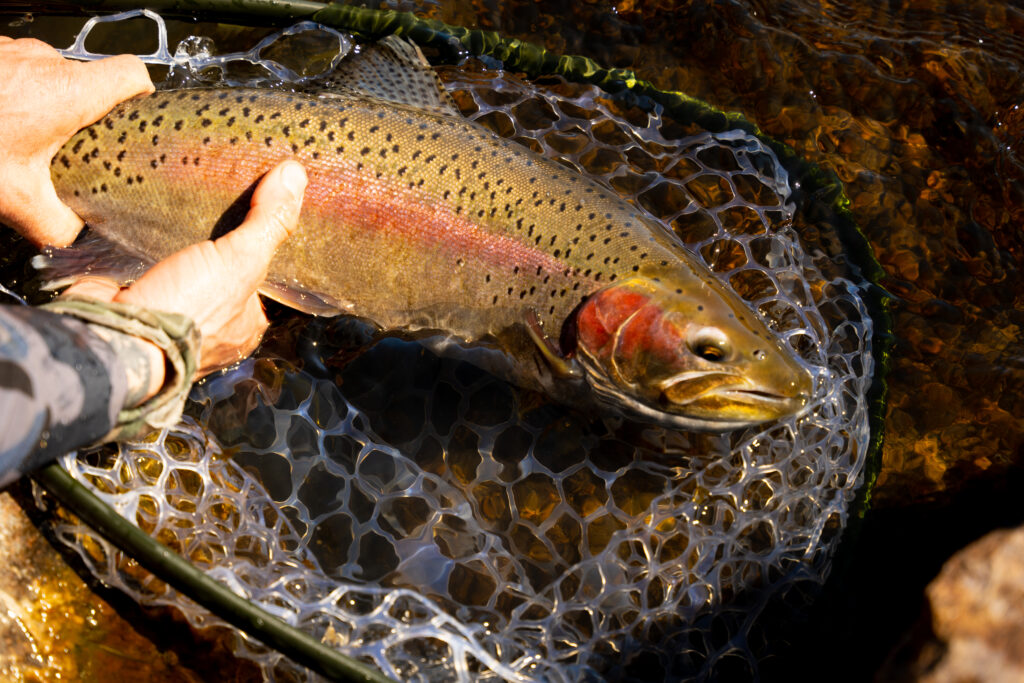
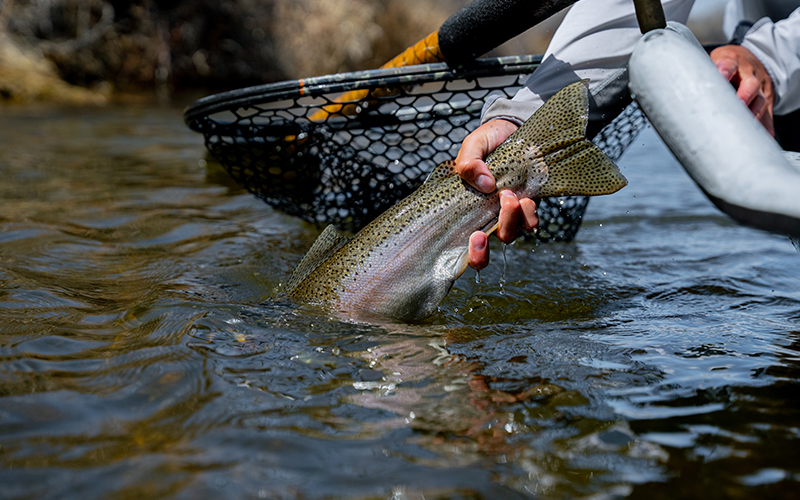
Winter Fly Fishing: Find Success
Winter Fly Fishing: Tips and Techniques for Success in Cold Weather
Winter fly fishing can be a rewarding yet challenging experience. While many anglers put away their gear when the weather turns cold, winter offers a unique opportunity to catch fish in peaceful, serene settings. With fewer anglers around, you’ll have quiet, undisturbed waters to explore, and fish can often be more active in the cooler months. However, to be successful, you’ll need to adjust your strategies to deal with the lower temperatures and slower conditions.
Here’s how to make the most of your winter fly fishing adventures:
1. Bring Layers
The key to staying comfortable while winter fly fishing is proper clothing. In the cold, you need to stay warm without restricting movement. Start with moisture-wicking base layers to keep sweat off your skin. Follow this with insulating layers, such as fleece or wool, and top it off with a waterproof, windproof outer layer. Wool layers are our preferred base layer. Typically wool will retain heat better than other materials when wet.
Make sure you have thick socks, after all you are going to be standing in the water and your toes get cold quick. For your hands, fingerless gloves or glove liners will help keep your dexterity while allowing warmth. A well-insulated hat, such as a beanie or fleece-lined cap, will also keep heat from escaping through your head.
Pro Tip: Keep extra layers in your car incase you take a spill
2. Timing Is Key: Fish During the Warmest Parts of the Day
During the winter months, fish metabolism slows down, and they become less active. This means that you’ll need to target them during the warmer parts of the day, typically between late morning and early afternoon. The water temperature is usually higher at this time, making fish more likely to feed. With the colder water temperatures fish tend to want easy meals so a good drift and the correct depth is crucial. Work deeper water and slower-moving areas of the water where they can conserve energy. Pools, deep runs, or areas with structure like submerged rocks or logs can hold fish even in colder weather.
3. Adapt Your Fly Patterns
When fly fishing in winter, it’s important to adjust your fly selection. Cold water generally means slower metabolisms for fish, and they will be less willing to chase down fast-moving flies. Focus on offering flies that move slowly or remain stationary in the water. Fly sizes depends on the type of fishing you are doing but it is a good rule of thumb to fish smaller bugs in the winter and larger bugs in the summer. Midges and beatis tend to be a good choice in the winter. Bugs typically are a little darker in the winter than the summer months. Not to mention it can be cloudy in the winter and darker bugs tend to create a better profile.
Fishing streamers in the winter requires a slow approach to mimic the movement of struggling prey in cold water. During these months, fish are less active and more lethargic, so it’s important to focus on a slow retrieve that entices fish without triggering a chase response. To effectively fish streamers in winter, cast your fly across the current and let it swing naturally, allowing it to drift along with the water’s flow. If stripping the streamer, use long, slow pulls, keeping the fly near the bottom or close to structure where fish tend to congregate. Darker colors like black, olive, and brown are most visible in low-light conditions, and subtle movements will often yield the best results, as fish are more cautious and less aggressive in the cold.
4. Techniques for Winter Fly Fishing
Fishing in winter requires patience and a slightly different approach than in warmer months. Here are some techniques to improve your chances:
- Slow Down Your Presentation: In cold water, fish are less likely to chase a fast-moving fly. Try dead drifting your flies for long periods and focus on slow, deliberate retrieves when using streamers.
- Use a Long Drift: Take advantage of the winter stillness by casting your nymphs or midges upstream and allowing them to drift naturally with the current. Try to keep your line taut so you can detect subtle bites.
- Swinging Streamers: When fishing streamers, a slow and steady retrieve can be effective. Consider swinging your streamer across the current or slowly stripping it back to you. This mimics the movement of struggling prey, enticing the fish to strike.
- Watch for Subtle Bites: During winter, strikes can be soft, and fish are often reluctant to make big moves. Be attentive and try to feel for any subtle tugs on your line. Setting the hook too soon or too hard could result in missing the fish.
5. The Quiet Beauty of Winter Fly Fishing
One of the most enjoyable aspects of winter fly fishing is the peacefulness that comes with it. With fewer anglers around, the landscapes are often breathtakingly still, and the waters are tranquil. The crisp air, the sound of the river, and the solitude can make your time on the water more than just a fishing trip—it can be a moment of connection with nature. Remember to be patient, stay safe, and embrace the challenges that winter fly fishing presents.
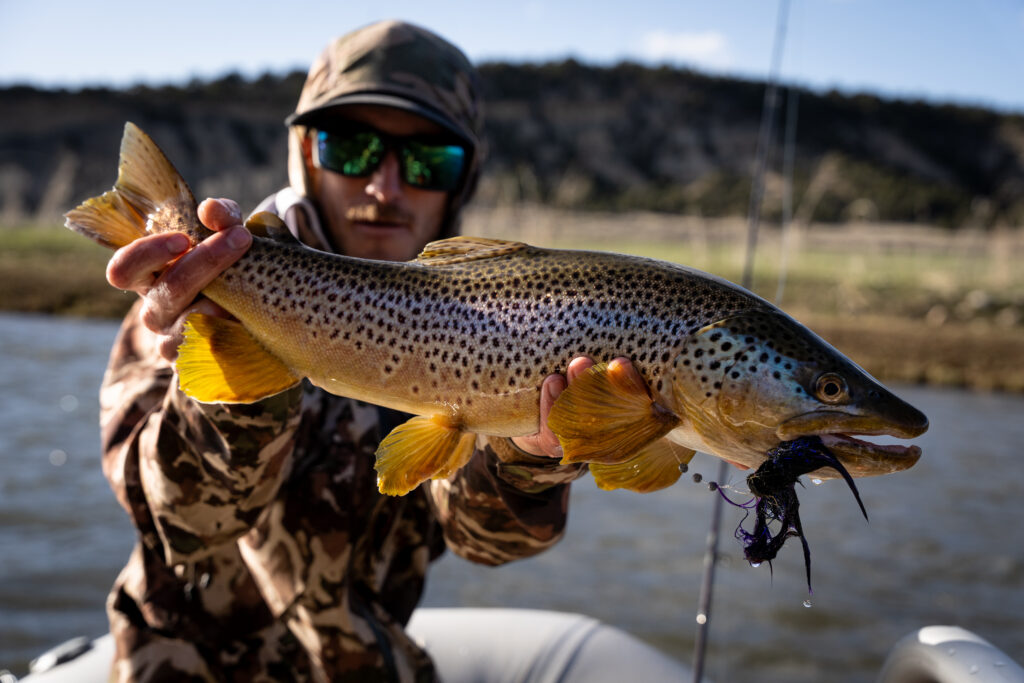
A Glimpse into Streamer Fly Fishing
Streamer fly fishing is a thrilling way to target larger fish, but it requires a variety of techniques to be effective. Whether you’re new to the practice or looking to refine your skills, here are some key streamer fishing techniques that can elevate your game on the water.
1. The Strip Retrieve
One of the most common and effective methods in streamer fishing is the strip retrieve. This technique mimics the erratic movement of baitfish and crawfish enticing predatory fish to strike.
- How to Do It: After casting your streamer, allow it to sink briefly. The depth can be the most important part. In order to find the right water column use a combination of sinking lines and different weighted streamers.
- Retrieve it by making quick, short strips of the line. Experiment with the speed and cadence of your retrieve—sometimes a fast retrieve will trigger a chase, while a slower approach can also be effective, especially in cooler water. A good rule of thumb is the colder the water the slower the retrieve.
- Tip: Understand what type of movement you are mimicking. Is it a sculpin, crayfish or bait fish. Their movement varies so yours should too.
2. The Swing Method
The swing technique involves letting your streamer drift through the current, allowing it to imitate a wounded or fleeing fish. This method is particularly effective in rivers with current.
- How to Do It: Cast across the current and let the streamer swing downstream. As it moves, retrieve slowly to keep tension on the line, but allow the current to do most of the work.
- Tip: Focus on structure—fish often hide behind rocks or along the edges of current. The swing method can draw them out to investigate.
3. The Jigging Technique
Jigging can be highly effective, especially in deeper waters. This technique mimics a baitfish trying to escape, drawing in curious predators.
- How to Do It: Cast your streamer and let it sink. Then, use short, sharp strips to raise and lower the streamer in the water column. This mimics a struggling fish and can provoke aggressive strikes.
- Tip: Vary the length and speed of your strips to find what the fish respond to best.
4. The Bounce Retrieve
This technique works well in areas with structure, such as rocky bottoms or submerged logs. The bounce retrieve creates a natural, erratic movement that can be irresistible to fish. Often times we like to use this when fishing a sculpin pattern.
- How to Do It: Cast your streamer and allow it to sink. Retrieve by bouncing the line—strip it quickly, then let it drop back down. This simulates a fish that is darting around obstacles.
- Tip: Pay attention to your surroundings. If you hit a snag, don’t be afraid to pause and let the streamer sit for a moment—this can provoke a strike. Jigged streamers can help avoid snagging the bottom.
5. The Chugging Method
Chugging is an exciting technique that involves making the streamer “pop” on the surface, mimicking a fleeing fish. It’s especially effective during low-light conditions or when fish are actively feeding on the surface.
- How to Do It: Cast your streamer and retrieve it with a series of quick, jerky strips. The goal is to create a splash or disturbance on the water’s surface.
- Tip: Use larger, more buoyant streamers for this method to maximize the splashing effect.
6. The Cross-Currents Technique
Utilizing the currents can help you present your streamer in a more natural way. This technique is especially effective in rivers and streams where fish are likely to be positioned to ambush prey.
- How to Do It: Cast your streamer upstream at an angle and let it drift down while retrieving. This presents the streamer at various depths and angles, increasing your chances of a strike.
- Tip: Adjust your angle and retrieve speed based on the current and the behavior of the fish.
Conclusion
Mastering different streamer fishing techniques can significantly improve your success on the water. Each method has its time and place, so don’t hesitate to experiment with different retrieves and presentations until you find what works best for the conditions and species you’re targeting. With practice and patience, you’ll be reeling in some impressive catches in no time.
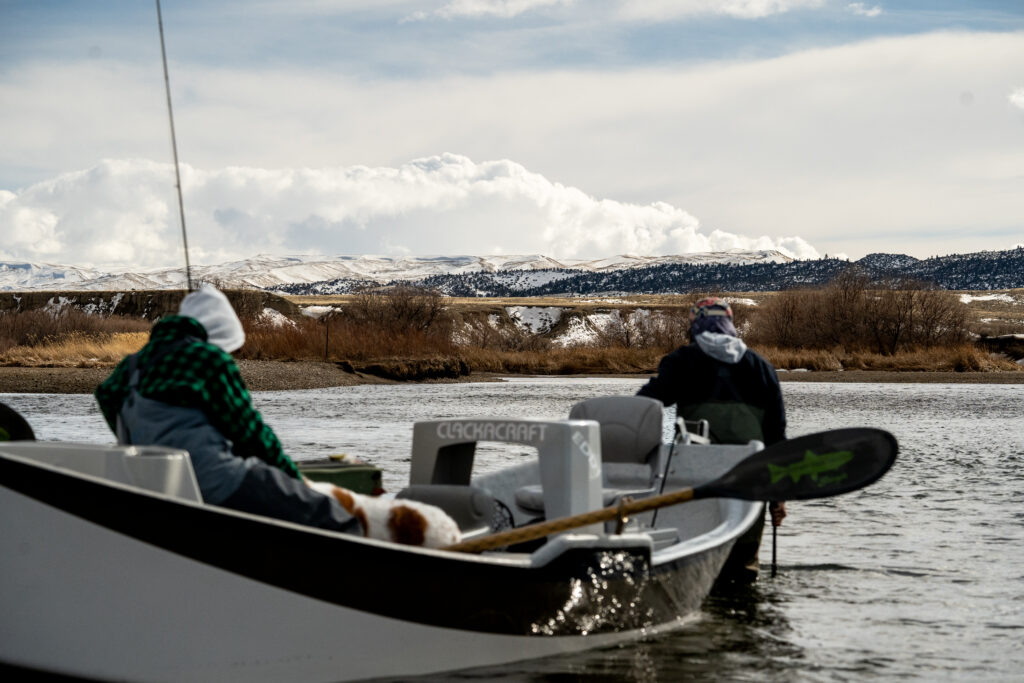
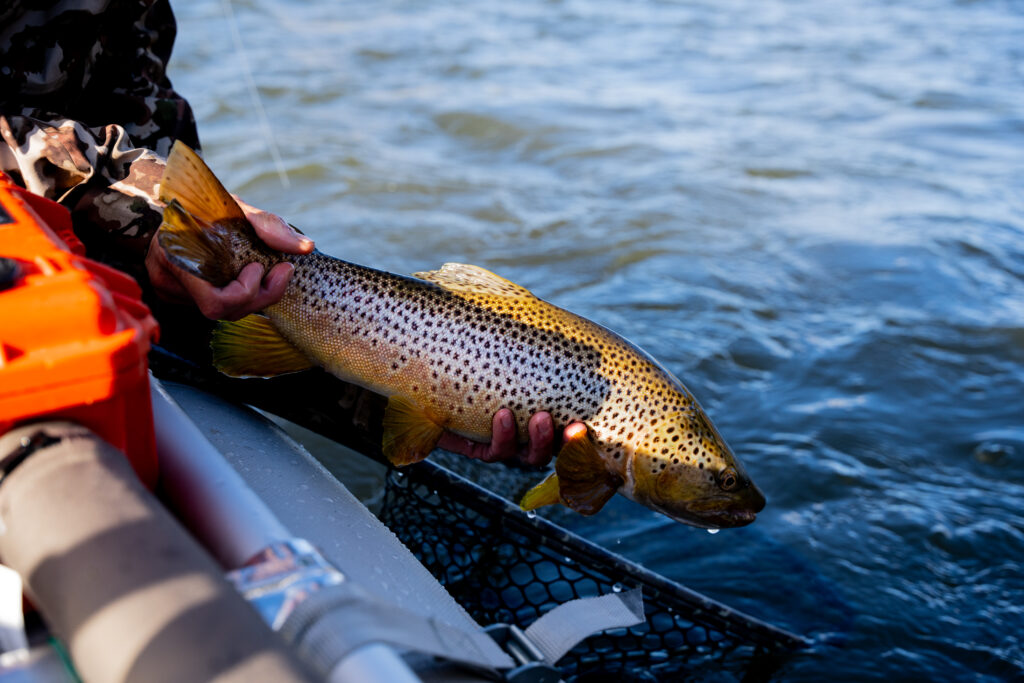
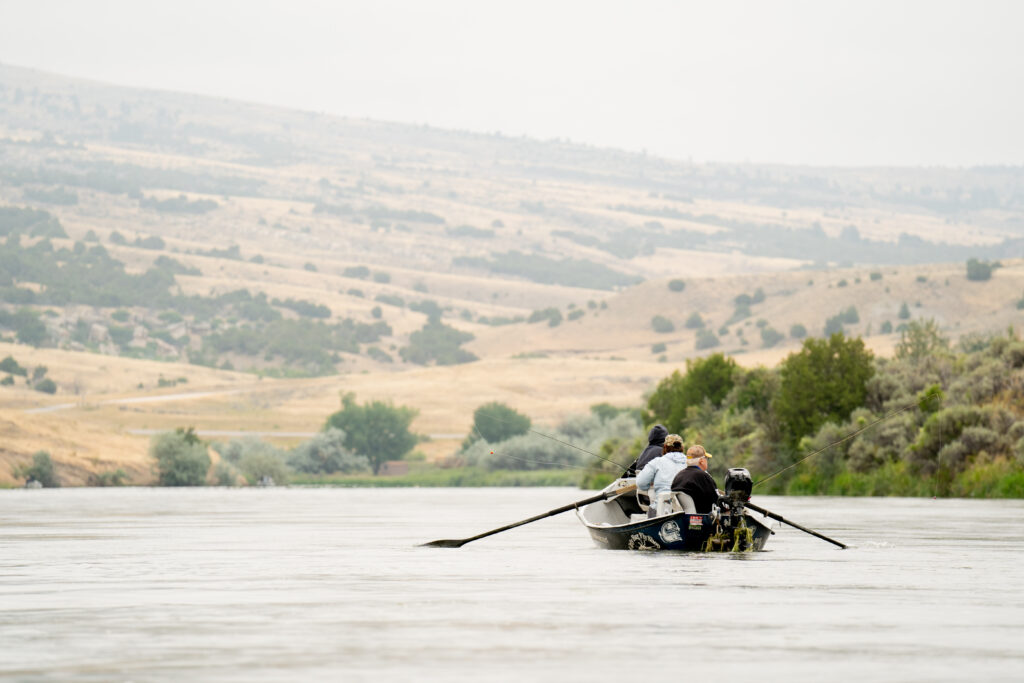
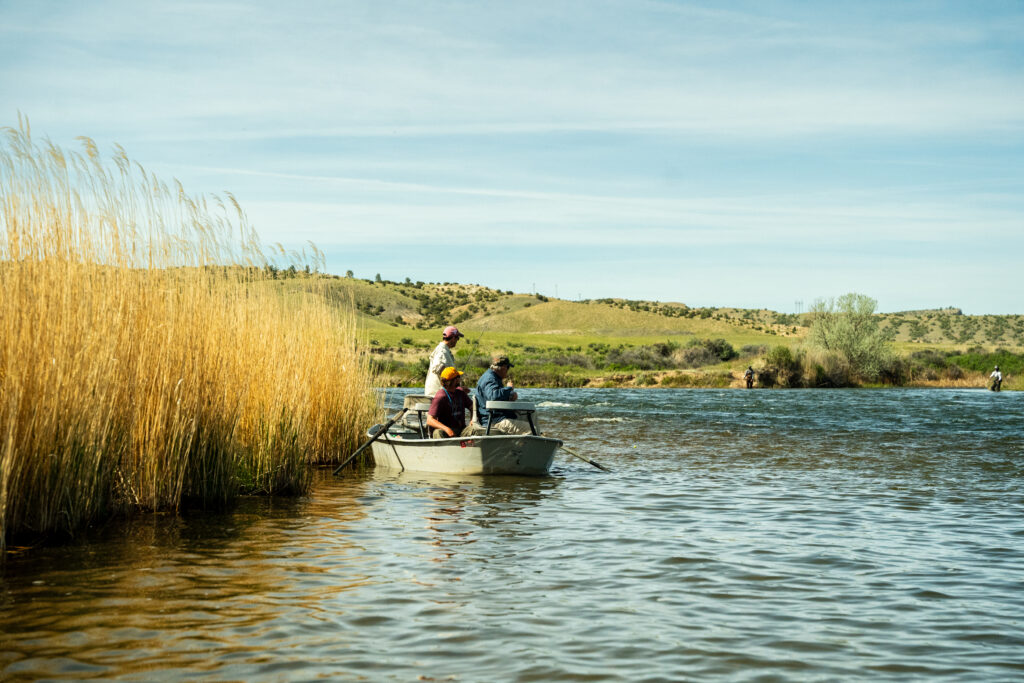
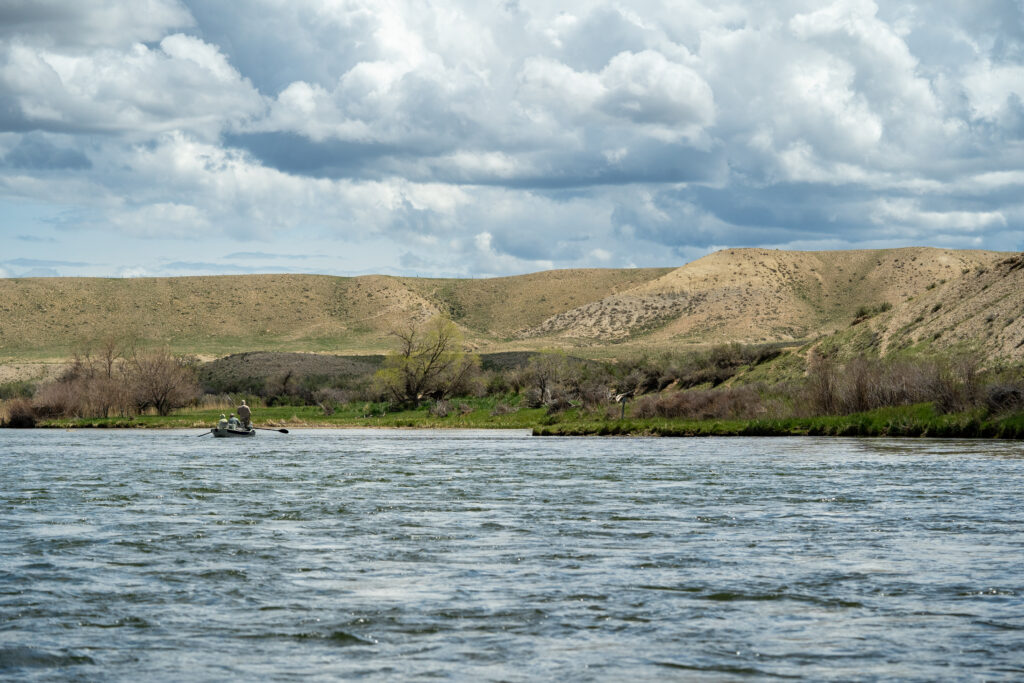
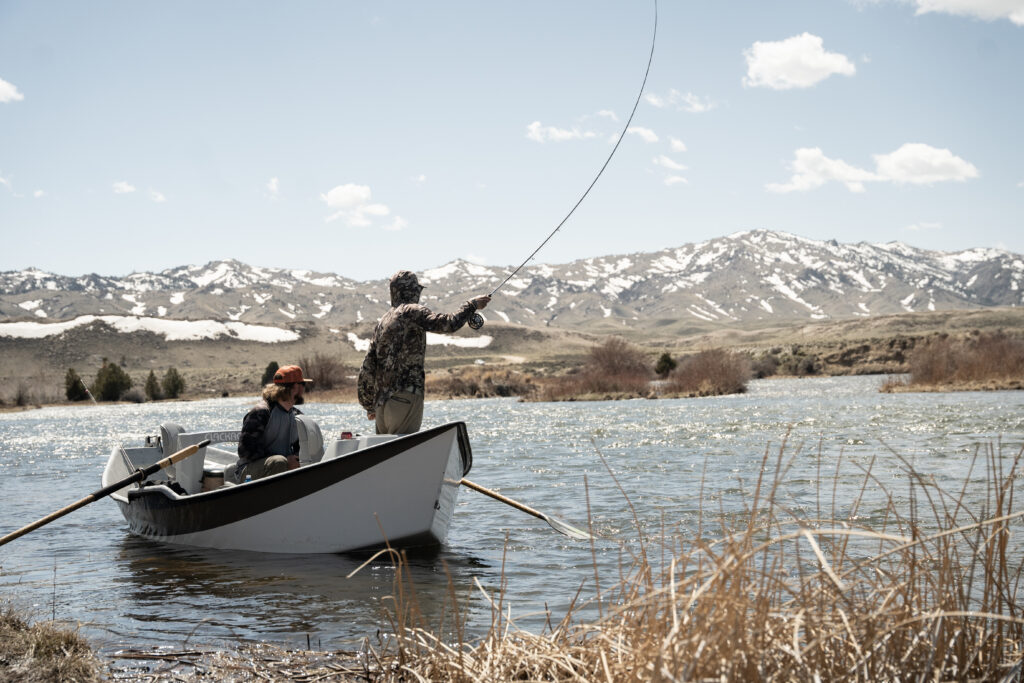
Mastering the Art of Fly Fishing from a Drift Boat
Fly fishing from a drift boat combines the serenity of a river environment with the precision of boat-based fishing, creating a unique and rewarding experience. Whether you’re a seasoned angler or a novice looking to expand your skills, understanding the nuances of this technique can significantly enhance your time on the water.
1. Understanding Your Drift Boat
Types of Drift Boats:
Drift boats are designed to navigate shallow, fast-moving rivers and provide stability and maneuverability. The most common types include the traditional wooden drift boat and modern fiberglass or aluminum versions. Each has its own advantages, but all are built to offer a steady platform for casting.
Boat Positioning:
Your position on the boat will affect your casting and the way you interact with the water. Typically, you’ll have an oarsman and one or two anglers. The oarsman controls the drift, while the anglers focus on fishing. Understanding the boat’s movement and positioning is crucial for effective fly fishing.
2. Gear and Preparation
Fly Rod and Reel:
Select a rod and reel suited for the type of water and fish species you’re targeting. From personal experience I like to use a 10 foot 6-weight rod. Ensure your reel has a smooth drag system to handle the demands of fighting fish.
Fly Selection:
Choose flies based on the hatch patterns in the river you’re fishing. Nymphs, dry flies, and streamers are common choices. Carry a variety of patterns to adapt to changing conditions.
Additional Gear:
- Waders and Boots: Keep dry and maintain traction with appropriate wading gear.
- Strike Indicators: Useful for detecting subtle takes when nymph fishing.
- Tippet and Leader: Use appropriate weights to match the flies and water conditions.
- Water Proof Gear: You are on the water and outside so having rain gear and a water proof boat bag/storage is incredibly important.
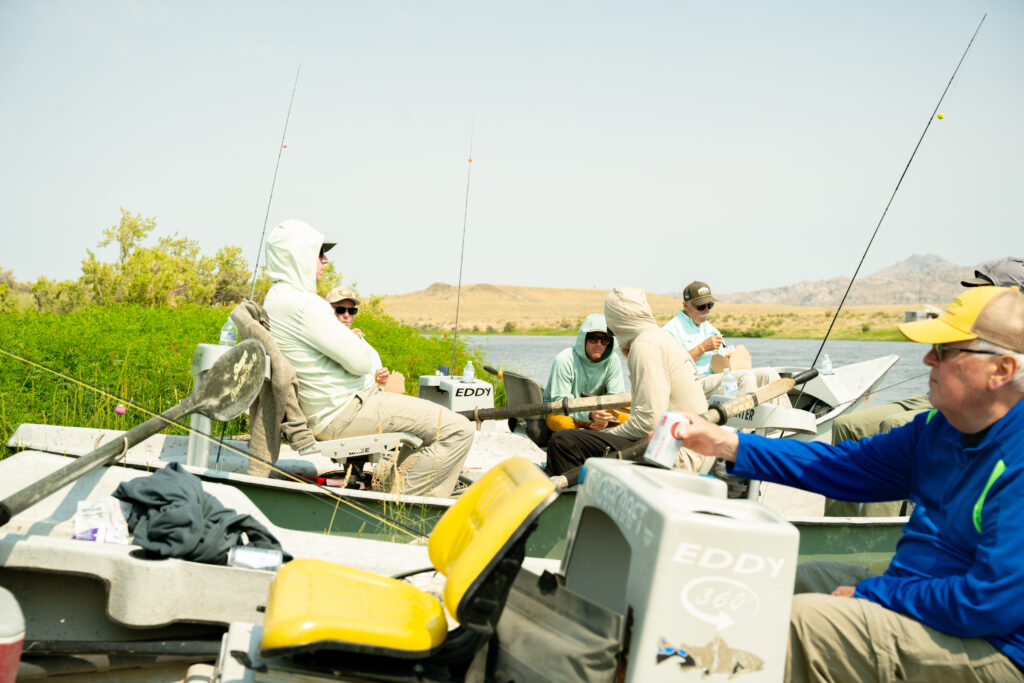
3. Techniques for Success
Casting from a Moving Boat:
Casting from a drift boat requires practice. Focus on these techniques:
- Maintain Balance: Keep your weight centered and avoid sudden movements that could unbalance the boat. Stand in the middle of the boat and always stay in the hip locks.
- Read the Water: Cast slightly upstream/downstream depending on the rivers flow. Slower water you will want to cast around 9 or 3 on the clock. Faster water you will want to cast more in the 2 or 10 positions. This technique helps present the fly in a more natural manner and increases your chances of a strike. (SET ON EVERYTHING)
- Use Short, Accurate Casts: Due to the moving nature of the boat, shorter, more accurate casts are often more effective than long-distance casts. Longer casts can be harder to get a good drift. Slow is smooth and smooth is fast. Keep your rod tip high when casting.
Drifting and Positioning:
- Communicate with the Oarsman: Good communication between the oarsman and anglers is key. Discuss preferred drifts and potential obstacles in the water.
- Adjusting the Drift: If the boat is moving too fast or too slow, let the oarsman know. They can adjust the speed to match the water’s conditions and your fishing needs.
Reading the Water:
- Look for Fish Holding Areas: Focus on seams, drop-offs, eddies, and structures like rocks and logs. These are often prime spots where fish congregate.
- Adjust Your Approach: Based on water speed and depth, adjust your casting and retrieve techniques to match the conditions.
4. Safety and Etiquette
Safety First:
- Wear a Life Jacket: Always wear a life jacket, especially in fast-moving water.
- Stay Alert: Pay attention to the water conditions and any potential hazards such as submerged rocks or debris.
Respecting Other Anglers:
- Share the Water: Be mindful of other anglers and maintain a respectful distance.
- Follow Local Regulations: Adhere to local fishing regulations and guidelines to ensure a sustainable fishing environment.
Conclusion
Fly fishing from a drift boat offers a unique perspective on river fishing, blending skill, strategy, and the beauty of the natural world. By understanding your boat, honing your casting techniques, and respecting the river environment, you’ll enhance your chances of success and fully enjoy the experience. Happy fishing!
The Essential Guide to Fly Fishing Floatants
Fly fishing, with its delicate artistry and precise technique, demands not only skill but also the right equipment. Among the myriad tools and accessories fly fishers rely on, floatants play a crucial role in ensuring that flies perform optimally on the water. In this guide, we’ll explore the various types of fly fishing floatants available, their uses, and how to choose the right one for your needs.
What is a Fly Fishing Floatant?
A fly fishing floatant is a substance applied to fly patterns to make them buoyant or maintain their buoyancy. Since many flies are designed to mimic insects that float or skitter on the water’s surface, a floatant helps keep these patterns from sinking and losing their effectiveness. Floatants are essential for maintaining the natural presentation of dry flies, which are often the key to attracting fish.
Types of Fly Fishing Floatants
Gel Floatants
Description: Gel floatants often have a thick, viscous consistency that allows for precise application. High N Dry’s Gel Floatant, however, is designed to be a bit thinner than the other gel products on the market so that it can be applied to finer fly fibers, such as CDC. Gels are typically dispensed from a tube or bottle and are easy to apply to specific areas of the fly.
Benefits: Gel floatants are excellent for achieving long-lasting buoyancy. They are less likely to be washed off by water or cast, making them ideal for high- stress fishing situations. In fact, unlike other gels, High N Dry’s Gel Floatant soaks in to the fly fibers, creating even longer lasting waterproofing.
Usage: Best for fly fishers that like to dress particular areas of the fly and for flies that need a high degree of buoyancy or when fishing in challenging conditions where the fly is likely to be submerged or affected by currents.
Liquid Floatants
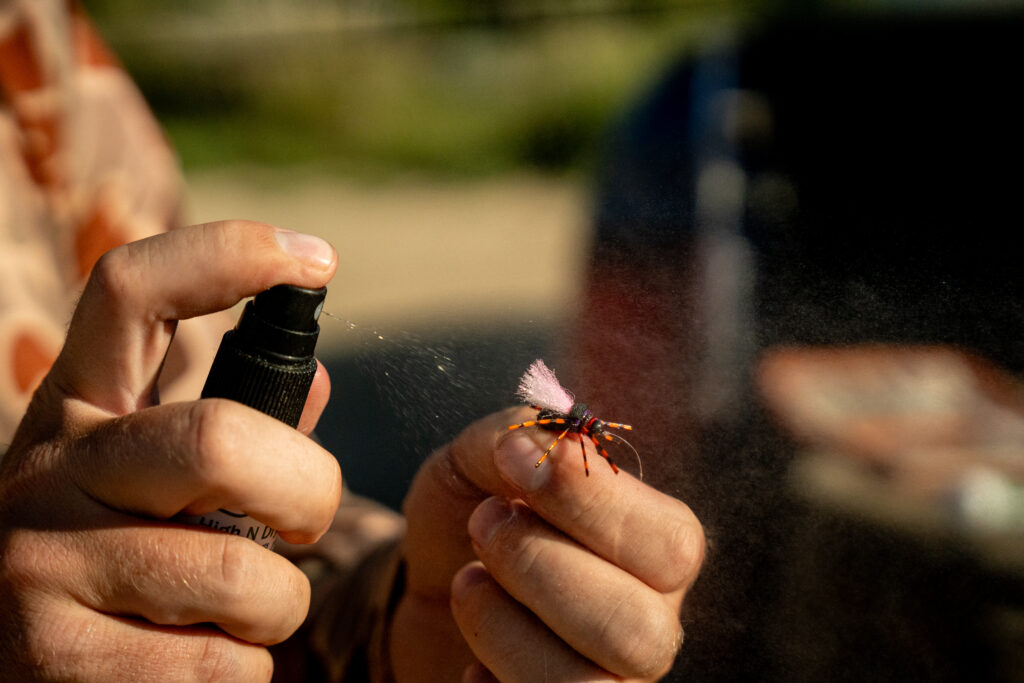
Description: Liquid floatants can be applied in two different methods – either by dipping a fly in a bottle or using a spray bottle. Dipping the fly is quick, easy, and will coat the entire fly with floatant. Spray floatants come in aerosol or pump bottles and can also be applied quickly and evenly, but also allow for treatment of specific areas of a fly.
Benefits: Liqiud based floatants are a convenient and efficient way of treating flies and are often used as a general-purpose floatant. Like the Gel Floatant, both High N Dry Liquid Floatant and Liquid Spray Floatant soak into the fly fibers and waterproof from the inside out, creating a longer lasting effect on the fly.
Usage: Ideal for anglers who aren’t as particular about which parts of the fly they want to treat and for those who prefer a quick and easy application process.
Powder Floatants
Description: Powder floatants are dry powders that are usually applied by brush or dipping the fly into the powder. Some powder floatants also include desiccant, which absorbs water as well. Powders generally trap air, which creates a buoyancy effect. High N Dry offers both a straight powdered floatant with an applicator brush and a combination powdered floatant with desiccant.
Benefits: Where the liquid and gel floatants waterproof the fly, powder-based floatants are better at clinging to the fly fibers, trapping air, and adding buoyancy. Powders that also include desiccant are perfect for reviving a fish-slimed or drowned fly for continued use.
Usage: Should be used in conjunction with a gel or liquid floatant, but also great for those fly fishers that like to dress certain areas of the fly (powder with brush) or for reviving fish-slimed or waterlogged flies during use (powder with desiccant).

Choosing the Right Floatant
When selecting a floatant, consider the following factors:
Type of Fly: Different flies require different levels of buoyancy. Dry flies may need more robust floatants, while emergers and nymphs might benefit from lighter options.
Fishing Conditions: Assess the conditions you’ll be fishing in. For example, if you’re fishing in heavy rain or fast-moving water, a more durable floatant like liquid or gel might be necessary.
Ease of Use: Some floatants are easier to apply than others. Choose a type that fits your preference and the demands of your fishing situation.
Frequency of Use: If you fish regularly or for extended periods, consider floatants that offer long-lasting performance to minimize the need for constant reapplication.
What is the floatant made of: not all floatants are made the same. Consider whether the floatant is made from environmentally friendly materials or whether it includes harmful materials, such as petroleum-based products (all High N Dry products are 100% environmentally friendly).
HIGH N DRY’S SUGGESTIONS:
Regardless of the fishing conditions, we suggest using a combination of either High N Dry’s Gel, Liquid, or Liquid Spray Floatants (applied first) as well as the Powdered Floatant with Applicator Brush. This will both waterproof the fly and add buoyancy. Then, when you need to revive the fly, use High N Dry’s Powdered Floatant and Desiccant.
You should also always apply High N Dry’s Paste Floatant to your tippet and leader. Your fly floats, your fly line floats, you might as well make sure the whole system between the two float as well. While not a “floatant” per se, you should also apply High N Dry’s Fly Line Dressing to your fly line to coat the fly line and ensure it is working as intended.

Conclusion
Floatants are a vital part of any fly fisher’s toolkit, ensuring that your flies perform as intended and remain buoyant on the water’s surface. By understanding the different types available and their uses you can make an informed choice that enhances your fly- fishing experience. Whether you’re an experienced angler or a newcomer, selecting the right floatant can make a significant difference in your success on the water. Happy fishing!
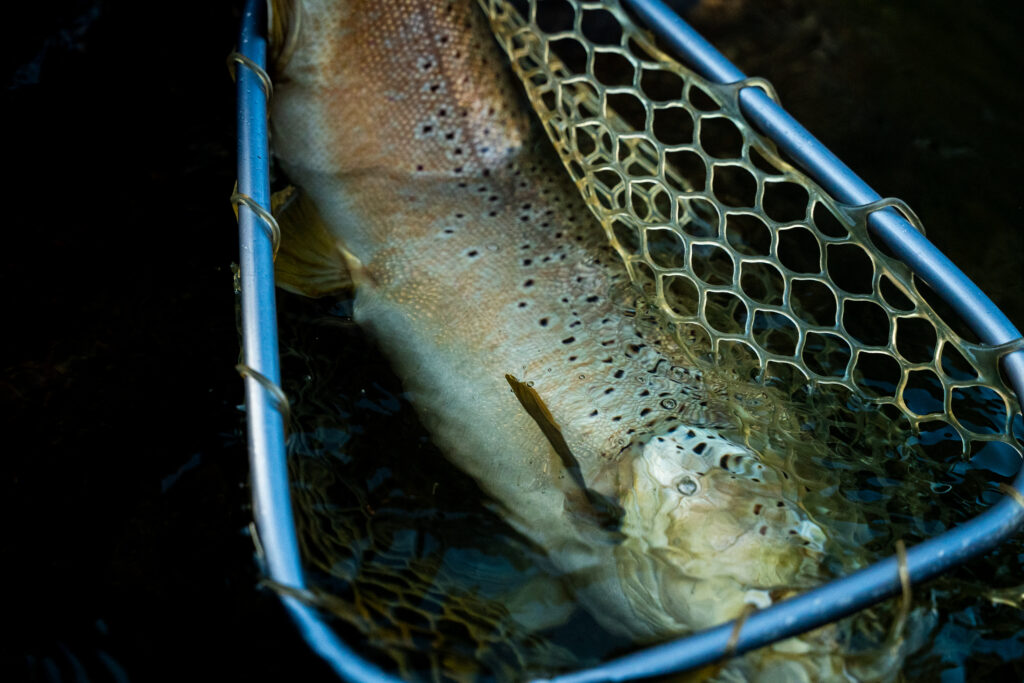
Reading Water: How to Fly Fish
Reading water is essential for successful fly fishing, as it helps you understand where fish are likely to be holding and feeding. Here are some tips and tricks to help you read water effectively:
1. Observe the Surface: Look for any disturbances on the surface of the water, such as rises, swirls, or dimples, which indicate the presence of feeding fish.
2. Water Depth: Different fish species prefer different depths of water. Trout, for example, often inhabit riffles, runs, and pools, while bass may prefer deeper pools or structure.
3. Current Breaks: Fish seek refuge from the strong current in areas where the water slows down or changes direction. Look for pockets behind rocks, along the banks, or near submerged logs.
4. Eddies and Back Eddies: These are areas of water where the current spins back on itself. Fish often hang out in these calmer areas, especially if there’s food drifting by.
5. Undercut Banks: Banks that have been eroded by the current often create pockets of deeper water where fish can hide. Casting close to these banks can be productive.
6. Seams: A seam is the line where two different currents meet. Trout, in particular, like to position themselves where they have easy access to both fast and slow-moving water. These areas are often rich feeding grounds.
7. Riffles: Riffles are shallow, fast-moving stretches of water typically found over gravel beds. They oxygenate the water and provide cover for fish. Trout often hold in the softer water at the edges of riffles, where they can feed more comfortably.
8. Pools: Pools are deeper, slower-moving sections of water often found below riffles. They provide fish with a resting place and are prime feeding spots, especially during warmer weather.
9. Structure: Look for underwater structure such as logs, rocks, or submerged vegetation. These provide cover for fish and attract prey.
10. Shadows: Pay attention to the shadows cast by trees, rocks, or other objects. Fish may be more comfortable and active in shaded areas, especially on sunny days.
11. Temperature: Fish are sensitive to water temperature. In warmer weather, they may seek cooler, deeper water, while in cooler weather, they may move to shallower areas where the sun warms the water.
9. Structure: Look for underwater structure such as logs, rocks, or submerged vegetation. These provide cover for fish and attract prey.
12. Wind: Wind can push food to certain areas of the water, concentrating fish in those spots. Additionally, wind-driven waves can create oxygenation and cover noise, making fish less wary.
Remember, reading water is as much an art as it is a science, and it takes time and experience to become proficient. Pay close attention to the water and the behavior of fish, and don’t be afraid to experiment with different techniques and locations.
Mastering the Art of Fly Fishing with Dry Flies
Fly fishing with dry flies is an art form that combines patience, skill, and an understanding of aquatic ecosystems. Unlike nymph or streamer fishing, dry fly fishing involves presenting flies that float on the water’s surface, imitating adult insects. It’s a method cherished by anglers for its elegance and the visual thrill of watching a trout rise to take the fly. In this guide, we’ll dive into the nuances of dry fly fishing, from equipment selection to casting techniques and understanding insect behavior.
1. Understanding Dry Flies:
Dry flies imitate adult insects that either land on the water’s surface or emerge from underwater to hatch into flying insects. Different dry flies mimic various insects such as mayflies, caddisflies, stoneflies, and terrestrial insects like ants and grasshoppers. Familiarize yourself with the local insect hatches to choose the appropriate dry flies for the season and location.
2. Essential Equipment:
Fly Rod: Opt for a lightweight rod with a delicate action, typically in the 3-5 weight range for most dry fly fishing situations.
Fly Reel: Choose a reel with a smooth drag system to handle the occasional larger fish that may take your fly.
Fly Line: Weight-forward floating lines are ideal for presenting dry flies accurately and delicately.
Leaders and Tippets: Use long, tapered leaders with fine tippets to ensure a natural presentation and minimize spooking fish. We like to use nylon leaders roughly 9ft in length. Nylon floats better than fluorocarbon leaders. Use this with our paste and keep your leader from getting water logged.

3. Presentation Techniques:
Approach Stealthily: Trout in clear water can be easily spooked by anglers, so approach your fishing spot with caution and avoid making unnecessary noise or disturbances.
Cast with Precision: Aim for accurate casts, placing the fly gently on the water’s surface to avoid alarming the fish.
Mend Your Line: Use mending techniques to control the drift of your fly, ensuring a drag-free presentation and natural drift.
Pay Attention to Drift: Watch the drift of your fly closely and be ready for any subtle takes or rises from feeding trout.
4. Matching the Hatch:
Observation is Key: Keep an eye on the water surface for signs of insect activity such as rises, hatching insects, or spent spinners.
Select the Right Fly: Match your fly pattern to the insects present on the water, both in size and color.
Experiment: If trout are not responding to your initial fly choice, try different patterns until you find one that triggers a response.
5. Fishing Strategies:
Dry Fly Techniques: Explore different dry fly presentations such as dead drifts, skittering, and twitching to entice trout.
Fish the Riffles: Target feeding trout in riffles, where they often congregate to intercept drifting insects.
Evening Rise: Take advantage of the evening rise when trout become more active and feed on surface insects with greater enthusiasm.
6. Practice and Patience:
Dry fly fishing requires patience and practice to master the art of presentation and observation.
Spend time on the water, honing your casting skills and studying insect behavior to become a more proficient dry fly angler.
Mastering the art of dry fly fishing is a rewarding journey that connects anglers to the rhythms of nature and the elusive behavior of trout. By understanding the nuances of presentation, matching the hatch, and honing your observation skills, you can increase your success on the water and experience the thrill of watching trout rise to your meticulously presented dry fly. So, grab your gear, head to the nearest trout stream, and immerse yourself in the timeless tradition of fly fishing with dry flies.
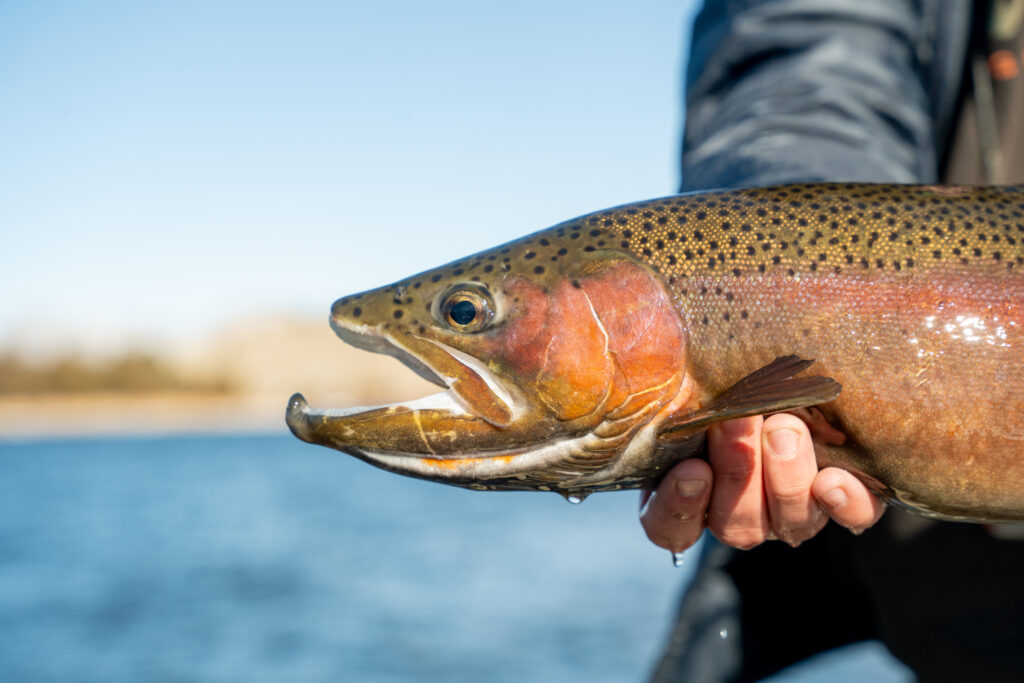
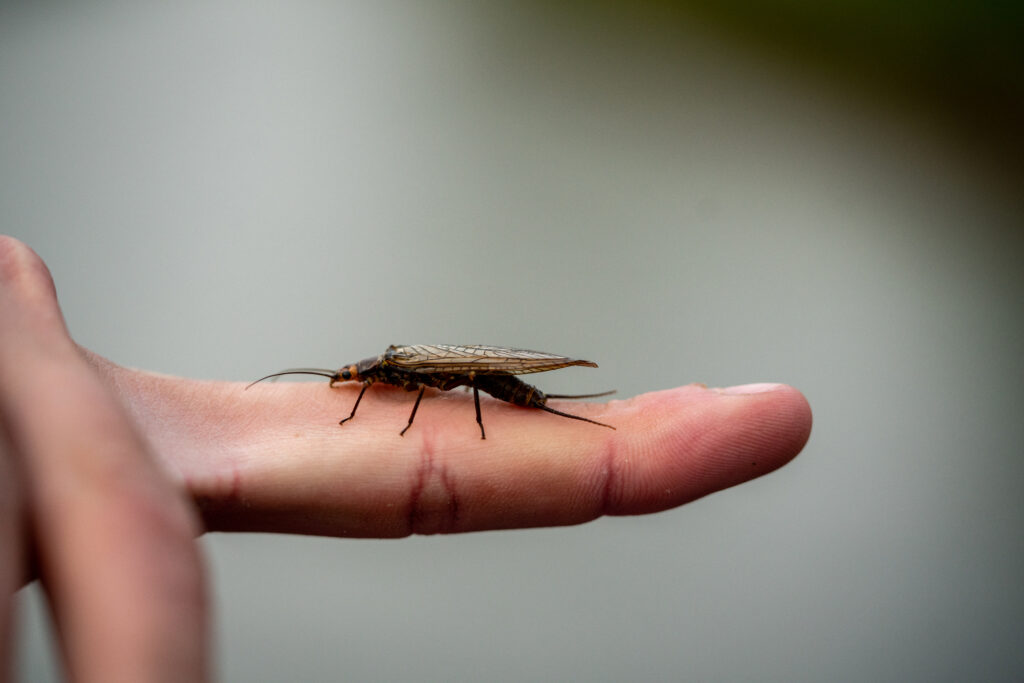
Fly Fishing: The Midge Life Cycle
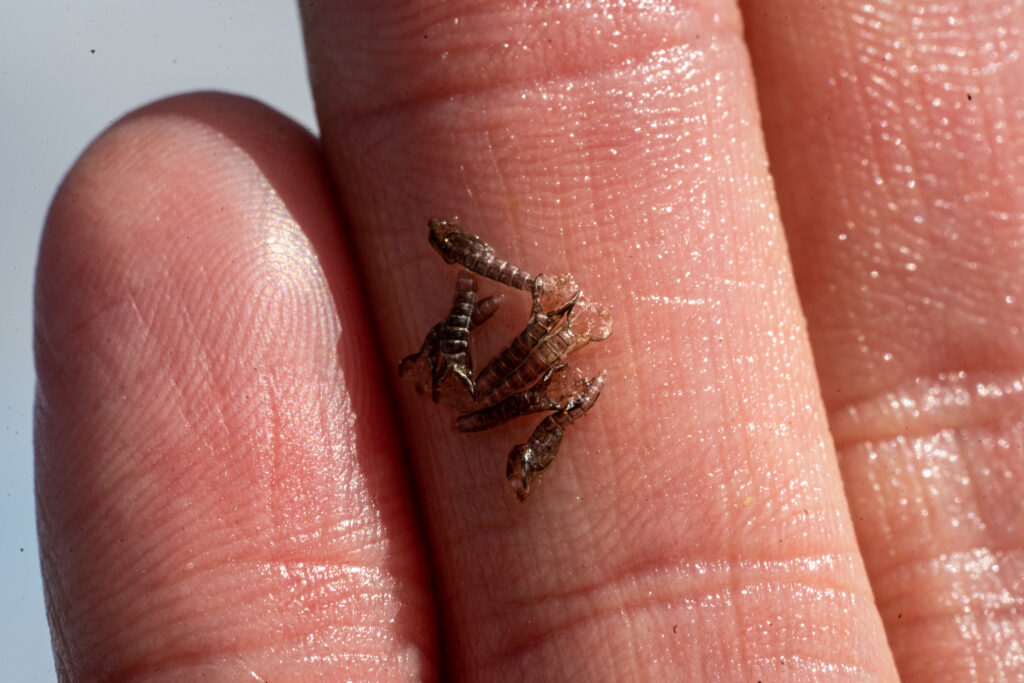
Photo by: River Ambassadors Media
Understanding the midge life cycle can be crucial to catching more fish. Not only are midges in just about every water source they are a large part of a trout’s diet. They are hatching year round and understanding the midge can really up your fly fishing game.
1. Egg Stage:
The life cycle of a midge begins with the laying of eggs. Female midges typically lay their eggs in water or damp soil, often near a water source like ponds, lakes, or marshes. These eggs are tiny and often laid in clusters. Depending on the species, the number of eggs laid can vary greatly.
2. Larval Stage:
Once the eggs hatch, they enter the larval stage. Midge larvae, also known as bloodworms, are aquatic and live in freshwater environments. They feed on organic matter, algae, and microorganisms found in the water. Larvae play a vital role in freshwater ecosystems as decomposers, breaking down organic material and helping to recycle nutrients. The best bug to throw when they are in this stage is a Zebra Midge. To help figure out what color to tie on flip some rocks and be observant of the bugs flying around you.
3. Pupal Stage:
After a period of growth and development, midge larvae enter the pupal stage. During this stage, the larvae undergo metamorphosis, transforming into adult midges. Pupae are typically found in the water, often in silken cocoons attached to submerged vegetation or other structures. This stage can last anywhere from a few days to several weeks, depending on environmental conditions. We like to use a WD-40 and or a Midge with a glass bead. When midges emerge they create an air bubble that they can ride to the top and begin spreading their wings to fly.
4. Adult Stage:
Once the metamorphosis is complete, adult midges emerge from their pupal cases and rise to the water’s surface. Unlike mosquitoes, which also undergo aquatic development, midges do not bite as adults. Instead, their primary focus is reproduction. Adult midges have short lifespans, usually only a few days to a couple of weeks, during which they mate and lay eggs, thus completing the life cycle. This one be tricky sometimes but when you see a pod of fish rising throw on a small Adams Parachute, Griffith Gnat or small dry. Dip it in your liquid High N Dry Flotant and brush with our powder floatant to keep that small bug up top.
5. Environmental Impact:
Midges play important roles in aquatic ecosystems. As larvae, they contribute to nutrient cycling by breaking down organic matter. Additionally, midge larvae serve as a food source for various aquatic organisms, including fish, amphibians, and insects. However, large swarms of adult midges can be a nuisance to humans, especially in areas near water.